Social Login Documentation
Getting Started
Firstly, we would like to thank you for purchasing Social Login Plugin theme and chosen it for your website. We outline all kinds of good information, and provide you with all the details you need to use the WordPress theme.
If you are unable to find your answer here in our documentation, feel free to ask for help from our support team, all you have to do is submitting a ticket via our Support Ticket system or email us: [email protected].
If you like this theme, Please support us by rating us 5 stars (How to rate?)
Opal Social Login
Opal Social Login plugin that lets your visitors to register and login to your site using their social profiles instead of forcing them to spend valuable time to fill the registration form. They don’t need to wait for validation emails or keep track of their username and password.
Install Plugin
Step 1 Download Opal Social Login
Step 2 Upload Opal Social Login through Plugins → Add New → Upload interface or upload Social Login folder to the /wp-content/plugins/ directory.
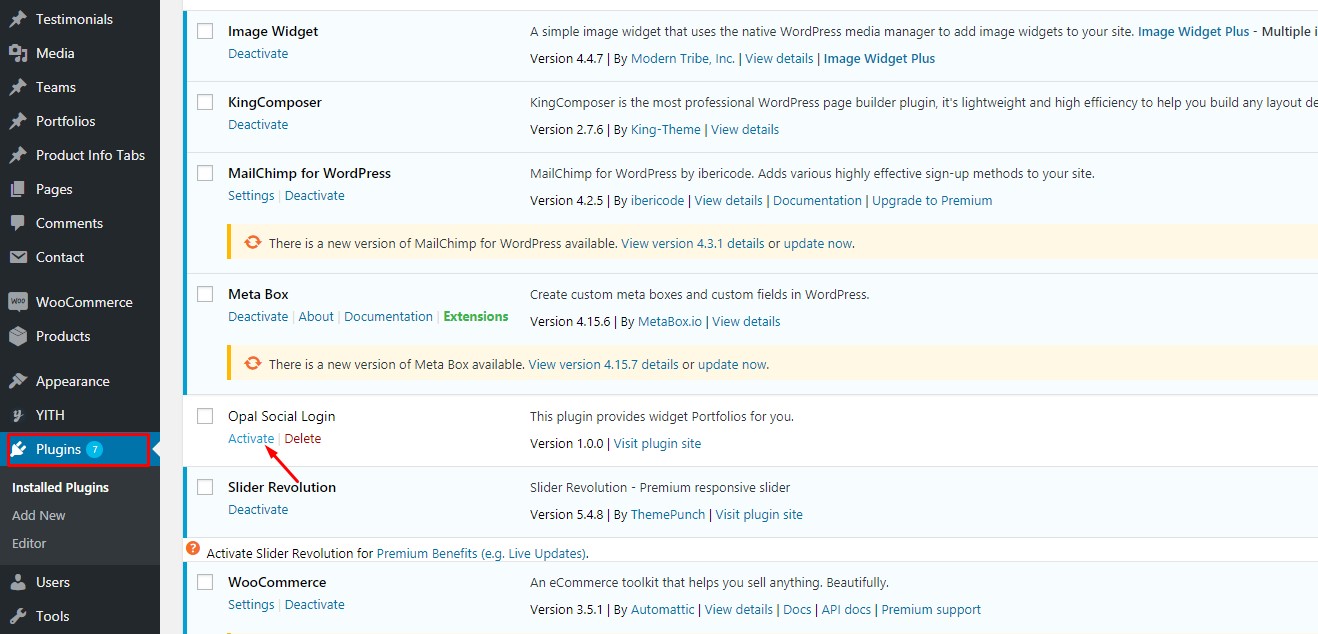
Step 3 Activate the Opal Social Login plugin through the ‘Plugins’ menu in WordPress.
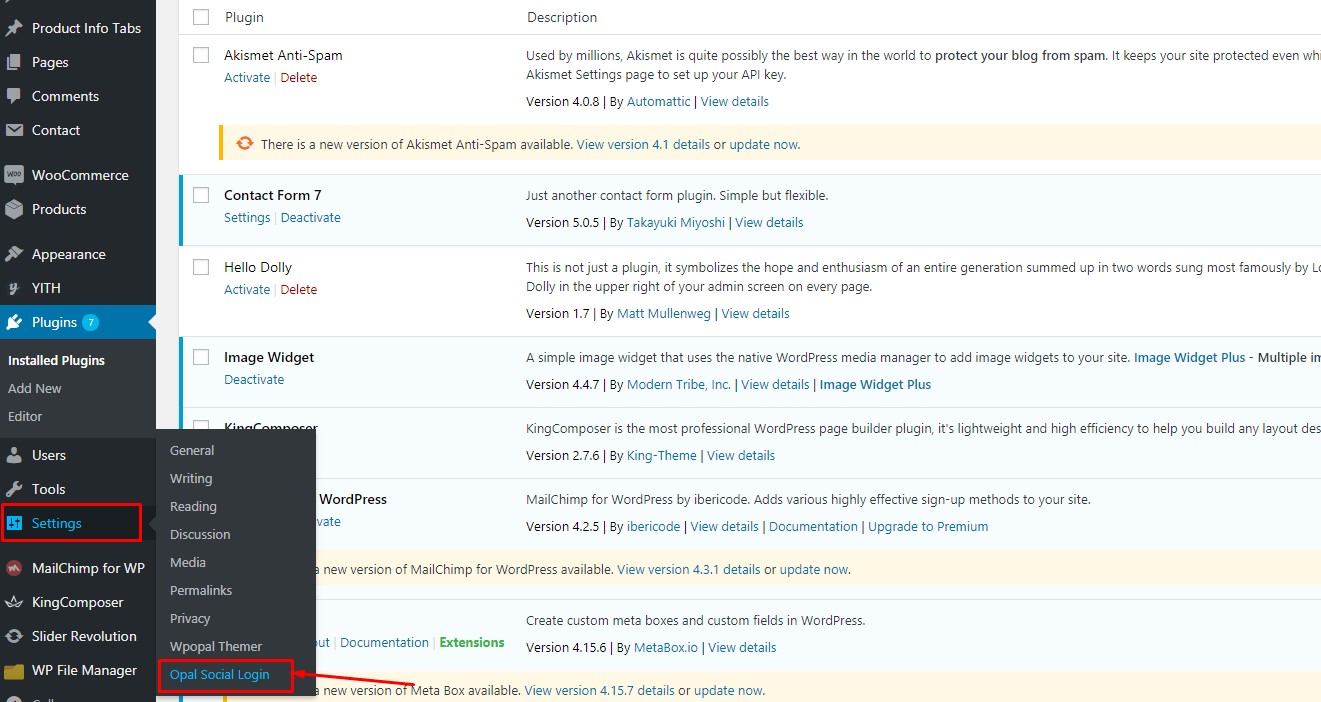
Step 4 Go to the Settings > Opal Social Login to see the available providers
Follow the installation steps below:
>Step 1 Download Opal Social Login
>Step 2 Upload Opal Social Login through Plugins → Add New → Upload interface

>Step 3 Activate the Opal Social Login plugin through the ‘Plugins’ menu in WordPress.
>Step 4 Go to the Settings > Opal Social Login to see the available providers
Available Social Login Providers
Providers are the services which the visitors can use to register and log in to your site. Before you could use them, they need to be set up.
Enable Facebook login in WordPress
1. Create a Facebook App
To be able to log in via Facebook you must create a Facebook app first.
1. Navigate to https://developers.facebook.com/apps/
2. Log in with your Facebook credentials if you are not logged in
3. Click on the green “Add a New App” button
4. Fill “Display Name” and “Contact Email”
5. Click on blue “Create App ID” button
6. Move your mouse over Facebook Login and click on the appearing “Set Up” button
7. Choose Web
8. Fill “Site URL” with the URL of your homepage. E.g. https://yoursite.com
9. Click on “Save”
10. In the left sidebar, click on “Facebook Login”
11. Add the following URL to the “Valid OAuth redirect URIs” field: https://yoursite.com/wp-content/plugins/opal-social-login/includes/hybridauth/facebook.php where the yoursite.com is your domain. Please note that since March, 2018 you can only use https domains to log in with Facebook. Learn more
12. Click on “Save Changes”
13. In the left sidebar, click on “Settings”
14. Here you can see your “APP ID” and you can see your “App secret” if you click on the “Show” button. These will needed in plugin’s settings.
15. Enter your domain name to the App Domains
16. Fill up the “Privacy Policy URL”. Provide a publicly available and easily accessible privacy policy that explains what data you are collecting and how you will use that data.
17. Save your changes
18. Your application is currently private, which means that only you can log in with it. In the left sidebar choose “App Review” and make your App public
2. Settings
Once your API Key and API Secret key has been added you need to verify the setup first. This verification helps you identify possible problems with the app.
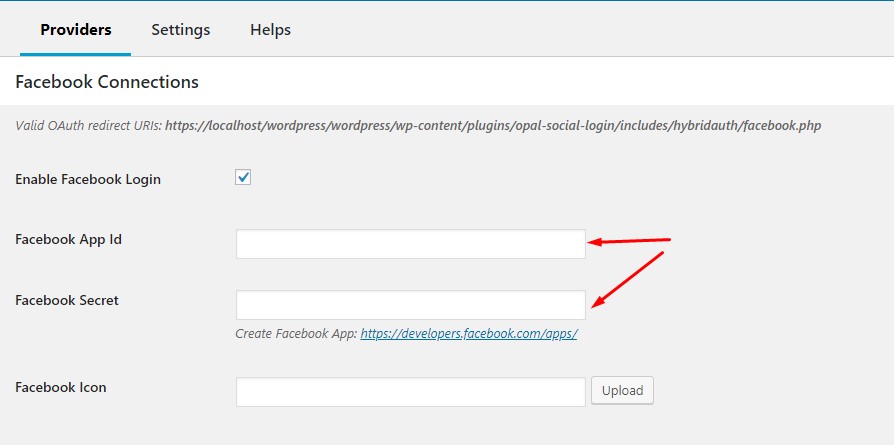
Facebook App Id The App ID of your Facebook app. You can find it at your App → left menu: Settings.
Facebook Secret The App Secret of your Facebook app. You can find it at your App → left menu: Settings.
Enable Google login in WordPress
1. Create a Google App
To be able to log in via Google you must create a Google app first.
1. Navigate to https://console.developers.google.com/apis/
2. Log in with your Google credentials if you are not logged in
3. If you don’t have a project yet, you’ll need to create one. You can do this by clicking on the blue “Create project” button on the right side! ( If you
already have a project, click on the name of your project in the dashboard instead, which will bring up a modal and click New Project. )4. Click the Create button.
5. Name your project and then click on the Create button again
6. Once you have a project, you’ll end up in the dashboard.
7. Click on the “Credentials” in the left hand menu to create new API credentials
8. Select the OAuth consent screen!
9. Enter a name for your App under the “Application name” field, which will appear as the name of the app asking for consent.
10. Fill the “Authorized domains” field with your domain name. For example if the URL of your site is http://yoursite.com/ then your domain will be yoursite.com !
11. Press “Save” and you will be redirected back to Credentials screen.
12. Click the Create credentials button and select “OAuth client ID” from the dropdown.
13. Your application type should be “Web application”
14. Name your application
15. Add the following URL to the “Authorised redirect URIs” field: http://yoursite.com?hauth.done=Google where yoursite.com is your site’s URL
16. Click on the Create button
17. A modal should pop up with your credentials. If that doesn’t happen, go to the Credentials in the left hand menu and select your app by clicking on its name and you’ll be able to copy-paste the Client ID and Client Secret from there.
2. Settings
Once your API Key and API Secret key has been added you need to verify the setup first. This verification helps you identify possible problems with the app.
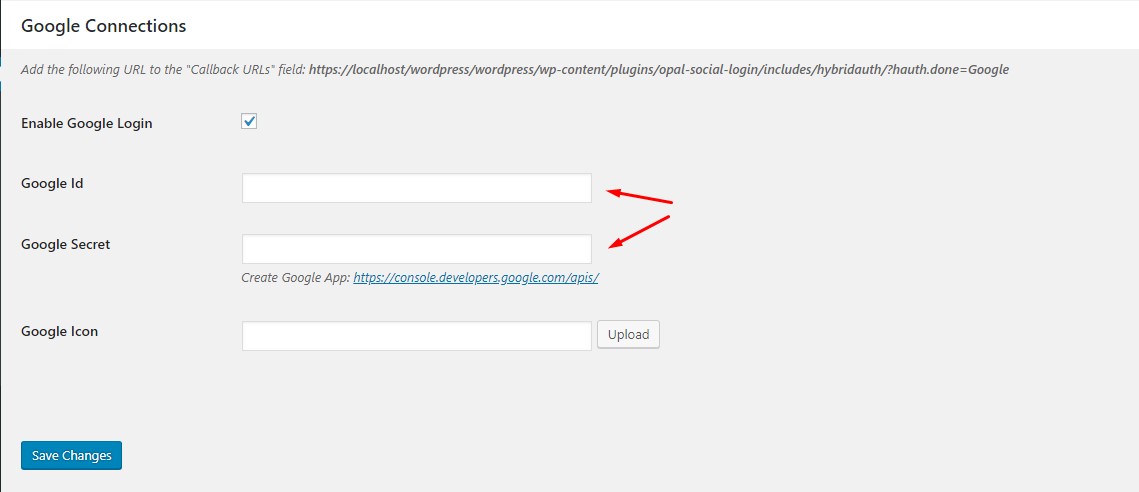
Google Id The Client ID of your Google app. You can find it at left menu: Credentials → select your App.
Google Secret The Client Secret of your Google app. You can find it at left menu: Credentials → select your App.
Enable Twitter login in WordPress
1. Create a Twitter App
To be able to log in via Twitter you must create a Twitter app first.
1. Navigate to https://developer.twitter.com/en/apps/create
2. Log in with your Twitter credentials if you are not logged in
3. If you don’t have a developer account yet, please apply one by filling all the required details! This is required for the next steps!
4. Once your developer account is complete. Navigate back to https://developer.twitter.com/en/apps/create if you aren’t already there!
5. Fill the App name, Application description fields. Then enter your site’s URL to the Website field – it also appears on the Getting Started page of Twitter Provider. For example: https://yoursite.com
6. Tick the checkbox next to Enable Sign in with Twitter!
7. Add the following URL to the “Authorised redirect URIs” field: http://yoursite.com/wp-content/plugins/opal-social-login/includes/hybridauth/twitter.php where yoursite.com is your site’s URL
8. Fill the “Terms of Service URL, Privacy policy URL and Tell us how this app will be used” fields!
9. Click the Create button.
10. Read the Developer Terms and click the Create button again!
11. Select the Permissions tab click Edit.
12. Tick the Request email address from users under the Additional permissions section and click Save.
13. Go to the Keys and tokens tab and find the API key and API secret key
2. Settings
Once your API Key and API Secret key has been added you need to verify the setup first. This verification helps you identify possible problems with the app.
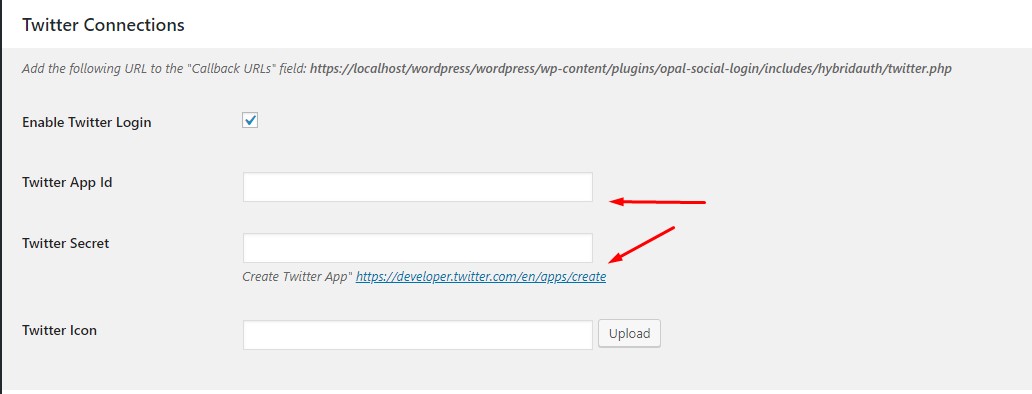
Twitter App Id The API Key of your Twitter app. You can find it at your App → Keys and Access Tokens tab
Twitter Secret The API Secret key of your Twitter app. You can find it at your App → Keys and Access Tokens tab.
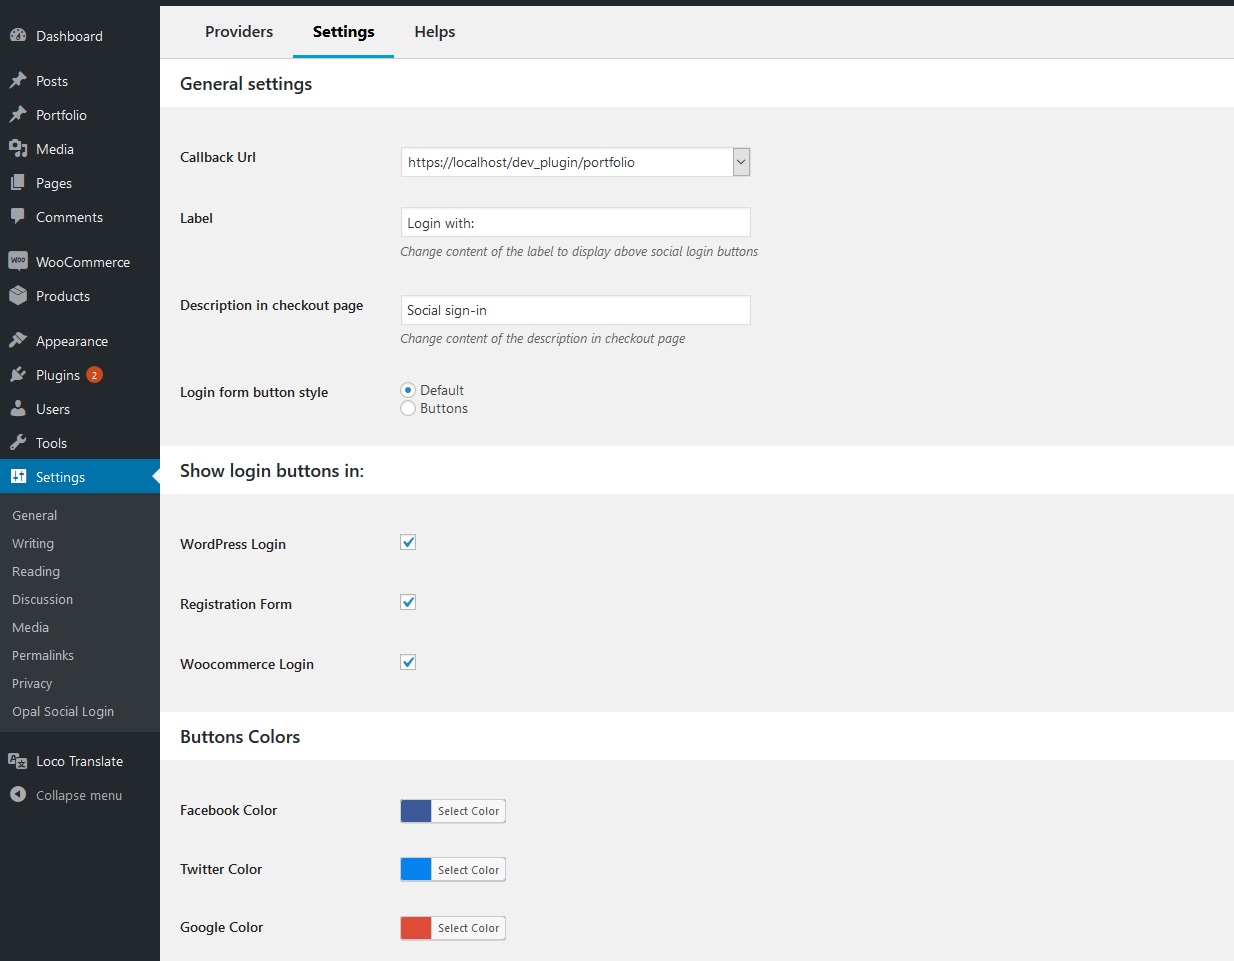
Settings
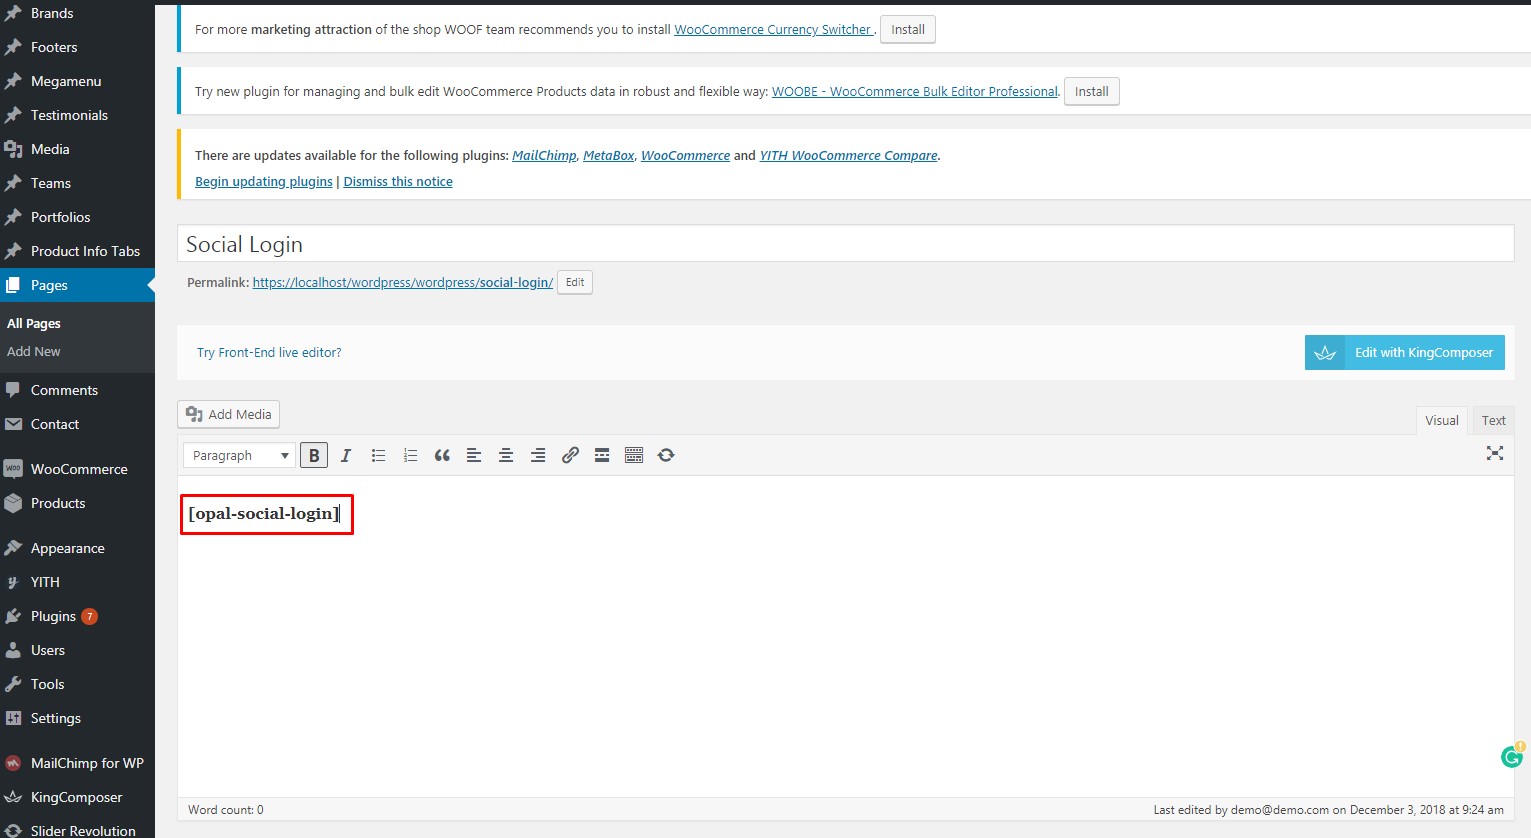
Shortcode for Opal Social Login
Opal Social Login comes with several shortcodes that can be used to insert content inside posts and pages.
The shortcode for agents profile: [opal-social-login]
Hook
Hooks in WordPress essentially allow you to change or add code without editing core files. They are used extensively throughout WordPress and WooCommerce and are very useful for developers.
Using hooks
If you use a hook to add or manipulate code, you can add your custom code to your theme’s functions.php file.
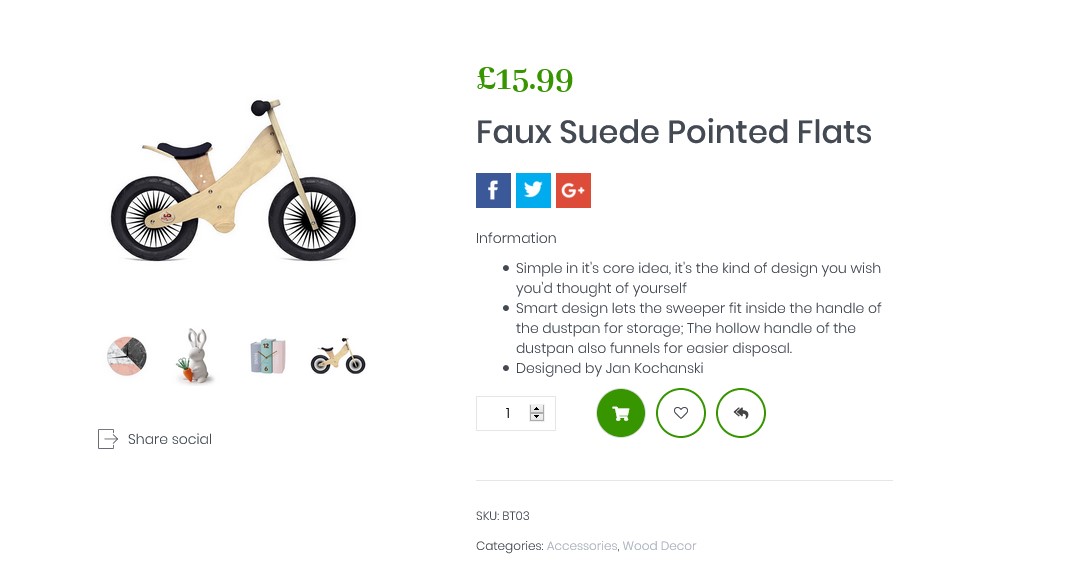
Using action hooks
To execute your own code, you hook in by using the action hook do_action('action_name');.
add_action( 'action_name', 'add_social_login', 15 );
ex: add_action( 'woocommerce_single_product_summary', 'add_social_login', 15 );
Get Support
If you are unable to find your answer here in our documentation, please take a photo screenshot with description detail about your problem or idea. Send all to email : [email protected] or ticket: [email protected]. Our technical team will check and try their best to help.
Our support scope
Our support covers configuration, building site as demo, trouble using any features, and bug fixes. We don't provide support for customizations or 3rd party extension.
Our support time
We try our best to monitor the email around the clock, however, this is not always possible due to different time zones. We will try to reply you as fast as we can.
Our working time is 8.00 AM - 5.30 PM, Monday to Friday (GMT+7). So if ask for help in the weekend, you may have to wait a little bit for support and please be patient.