Hi all,
Slider Revolution is an innovative, responsive WordPress Slider Plugin that displays your content the beautiful way. Before Opal WordPress had a tutorial about How to update Revolution Slider. In general the matter about Revolution Slider has many problems customers also usually meet up with like how to update, how to set up slider, how to add slider, edit it…Especially now it has been just released a new version 5.2.3.5 and exists some matters. Therefore, today we will write a detailed guide about How to set up Revolution Slider on Quickmart – Multipurpose WooCommerce WordPress Theme. Hoping via this blog, our customers will solve all wonders about it.
Before setting up Revolution Slider, remember to update it with the latest version.
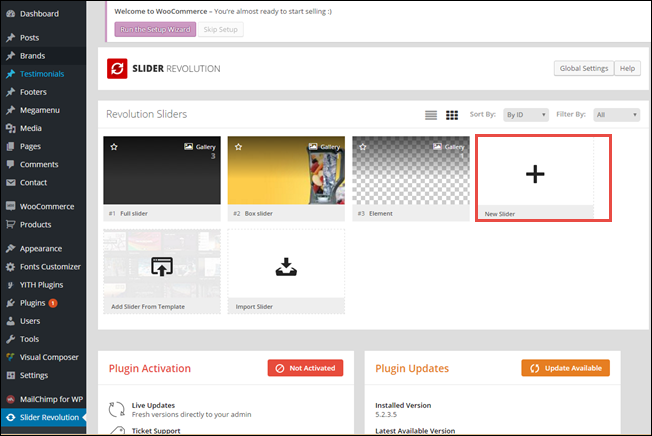
Step 1: From Dashboard to Slider Revolution a box of Slider Revolution appear
As you see the image, now there 2 sliders for homepage. If you want to add a New Slider, please click into New Slider. Or you can add Slider from theme or import slider.
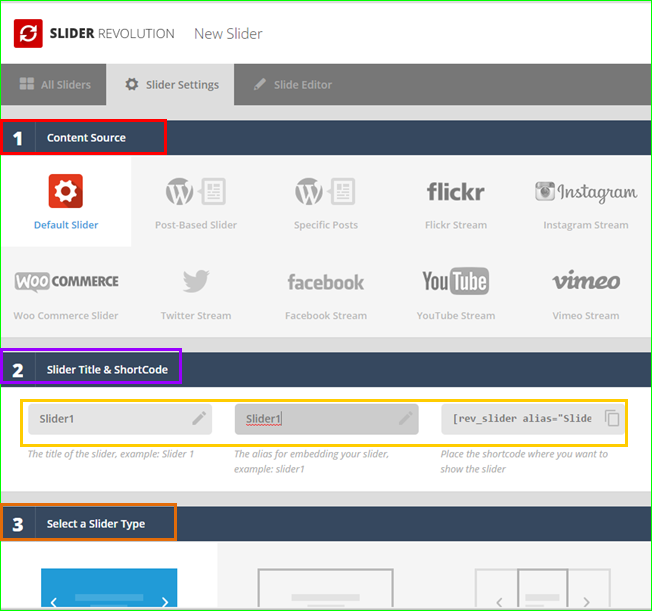
Step 2: Setting a new slider
Then you set up some its items such as Content Source, Slider Title & Shortcode, Select Title & Shortcode ( Put a slider name you want to add), Slide Layout, Customize, Build & Implement. Remember to Save Settings
Step 3: Setting up Slider1 (Slider1 you have just added)
Then you add Slider1, you will add layers for Slider1. For each slider you can add layers for that slider. Therefore, a theme will have many sliders and in each slider has inside layers. This depends on your choice to display which sliders for homepage.
Then you click icon “Add Layer” it will appear some item such as Add Text/HTML, add video, audio, image, object, shape, button..You can add anything into layer. Remember to Save Slide
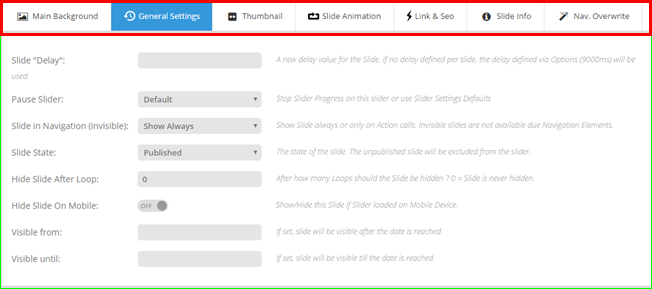
Step 3: General Setting
You can edit some items such as Main Background, General Setting, Thumbnail, Slide Animation…

In a slider has many layers, you want to appear a button to next layers. Remember to go to General Setting-> Choose Navigation -> Enable Arrows and choose style you want
Step 4: Set up Home page
After add new slider and layer, please go to Homepage and set up Revolution Slider, choose Slider1 (you have just add new slide) and Add Selected Slider. Then remember to Update
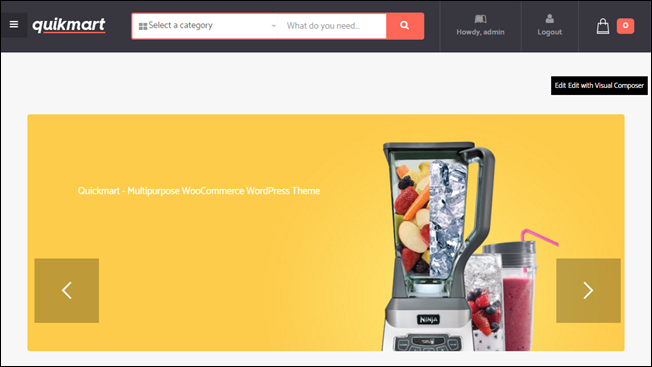
Step 5: Check slider in Frontend
Finally for all, you should check slider you added to your theme. If it is not right, please check and edit again.

In case you don’t want to display Slider1, you can choose another like Full slider, Box slider or Element that are available to display your website or you can create many other new sliders. It is up to you!
To sum up, above is all guides How to set up Revolution Slider. You can read and follow them. If you have any wonders, please leave a comment or contact us via our support channels Ticket Support System and [email protected], we will answer you right now. Remember to follow our social channels Facebook, Twitter, Linkedin, Youtube, Pinterest to update it!
Thanks so much!


